I know a lot of us are trying to get away from chemicals in our products, while doing our best to conserve money along the way. DIY Dryer Balls are an awesome way of doing just that. Made from wool, dryer balls can be used instead of dryer sheets. All you have to do is make a few (I like to use 4-5) and toss them into your dryer along with each load and watch the savings add up. These Wool Dryer Balls save you money, energy and time by cutting the dryer’s drying time and by you not having to use softeners or dryer sheets. When you use 4 balls in your dryer, you can cut up to an average of 25% off your large load drying time and cut around 30-45% off your small loads!! Less electricity, Less money!
So lets get started!
So lets get started!

Here are the supplies you will need:
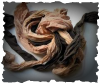
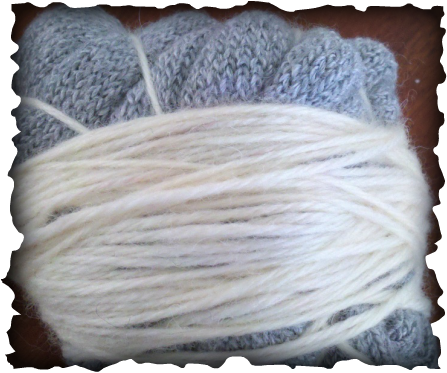
- Wool filler, cut into 1in strips -
Here I found some wool socks, but you can use sweaters, blankets etc, anything wool.
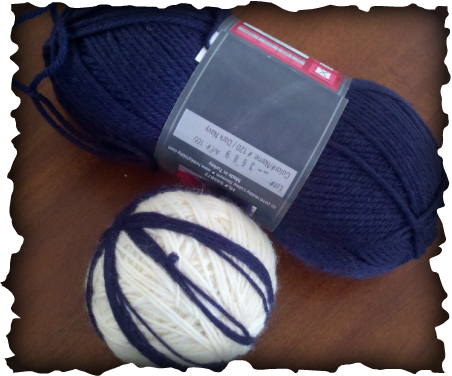
- 1-2 rolls of Wool yarn -
make sure you find 100% wool yarn so that it will felt correctly. I like to use a base color, and then other colors for added patterns on the outside.
-Scissors-
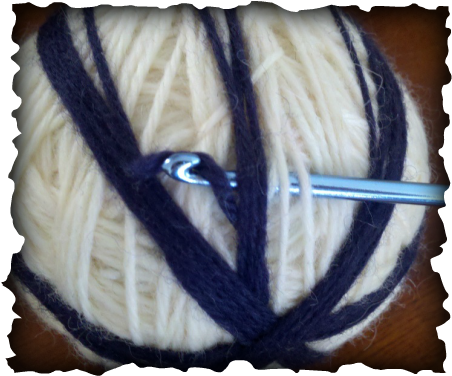
- Crochet Hook -
(used to tuck in the end of the yarn)
_Old Nylons -
(oops, forgot to add them to my supplies picture!))
- Wool filler, cut into 1in strips -
Here I found some wool socks, but you can use sweaters, blankets etc, anything wool.
- 1-2 rolls of Wool yarn -
make sure you find 100% wool yarn so that it will felt correctly. I like to use a base color, and then other colors for added patterns on the outside.
-Scissors-
- Crochet Hook -
(used to tuck in the end of the yarn)
_Old Nylons -
(oops, forgot to add them to my supplies picture!))
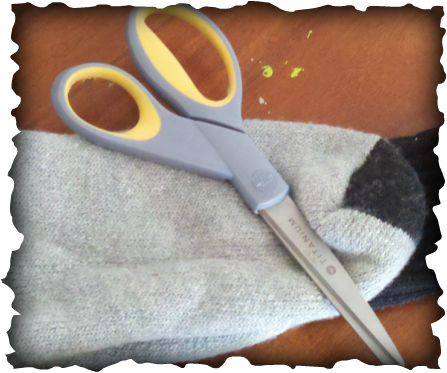
Start by cutting your wool filler into 1in wide strips. leave each strip as long as possible for a total of about 4-6ft in length. Once you have the strips cut, roll them around each other into a ball(ish) shape. Really, it will look more like a blob at this point!
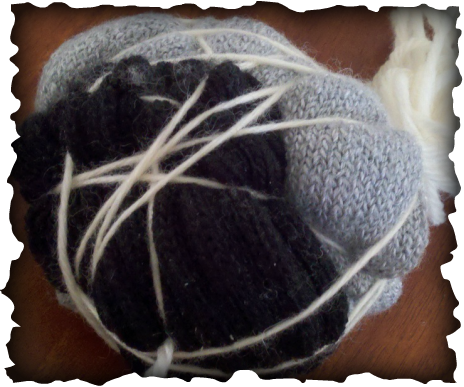
Use your wool yarn to hold the pieces together, once you get them rolled into a ball/blob.
Continue to wrap your wool yarn around the filler, alternating directions and making sure to make it all come together in a round shape. Keep wrapping until you can no longer see the inside filler. How much yarn you use will depend on how big of a ball you want to make, and how much filling you put inside. Remember, they will shrink down a bit during the felting process.

Once you are done winding the base yarn, Use your knitting needle to tuck the end down into the center. Make sure it is pretty secure, as you don't want it popping loose later on.
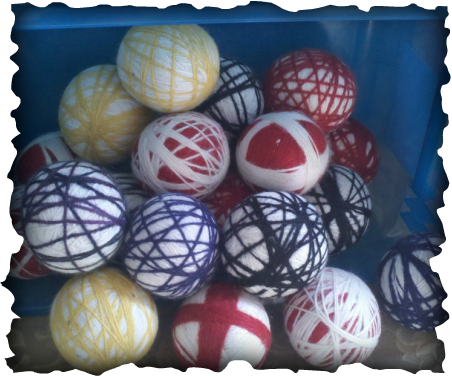
Now, if you want to add another color, wrap it around your ball in any pattern you like.
Again, make sure your ends are tucked down in nicely so that they don't come undone later on. There is nothing more frustrating then watching your ball bounce across the floor out of your hands, unwinding on the way :(
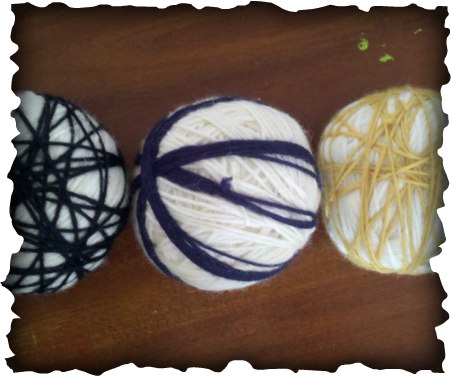
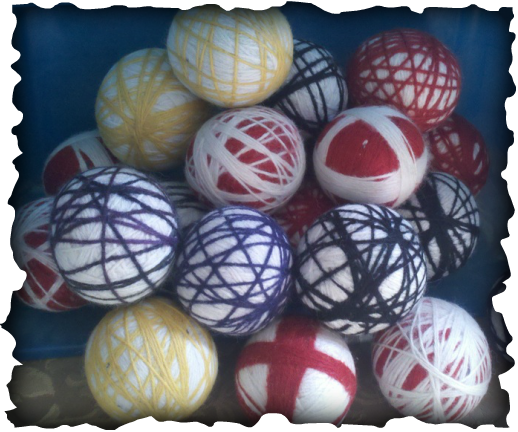
Here are a couple of different patterns that I have done.
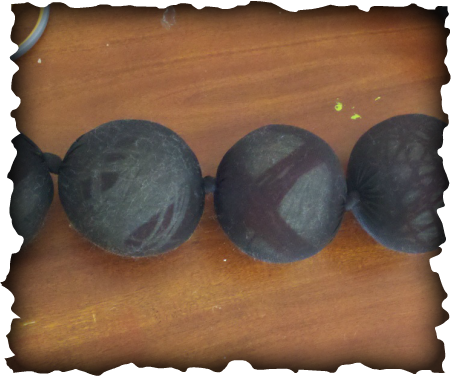
Now that the winding is done, you need to felt your dryer balls. For this you need old nylons.
Place the balls carefully down into the nylons. Make sure not to shove them in, or you might mess up the wool pattern you have worked so hard to get.
Between each ball, tie a knot or use a string to keep them separate.
This is important because if they are allowed to touch while being felted, they will stick together and become difficult to remove from each other. Felt is produced by matting, condensing and pressing fibers together.
Place your string of dryer balls into your washing machine, along with a towel or other small load of laundry. Let them run through a normal cycle.
One the wash cycle is done, through them immediately into the dryer, and let them run through a full high heat cycle. Once they are finished, repeat the washer/dryer cycles with them at least once more. (a lot of times I run my dryer balls through with my laundry loads 3-4 times, just to be sure they felt completely)
Once you believe the Balls to be felted, remove the nylons. YEAH! They are now ready to use!!! (if they are not fully felted, meaning you can still pull individual pieces apart from the others, just put them back in some nylons, and wash/dry them a few more times!)
Now, If you are worried about not getting the "fresh" smell that comes with dryer sheets, just go to your nearest health foods store, pick up your favorite essential oil(s) and add a few drops to your dryer ball. Then toss them in your dryer with your laundry and let them earn their keep! ;)
Thanks for checking this out! If you have any questions feel free to comment here and I will try to get back to you soon!
 RSS Feed